

 Dr. Marc A. Bochner on
 Prepare to Compete: Arch and leg mobility and strength are essential!
By Dr. Marc Bochner
Many of the runners and triathletes I see for lower extremity, hip and spinal conditions are surprised when I find that foot/ankle dysfunction is related to their symptoms further up in the knee, hip or back. Even though it makes sense that improper alignment/motion at the foot will affect the motion of the joints above, attention is often given first to the anatomical site where pain is being felt-- where the symptoms are. However, imbalances such as weak arch muscles, tight ankle ligaments and related calf muscle tightness and/or weakness can be "hidden” causes of pain and injury elsewhere.
Additionally, research also shows that weak arch muscles can be responsible for running speed decreasing with age and with increased risks of falling in the older population (1-5). The research also says that by doing some specific foot and leg strengthening exercises, loss of speed and balance can be avoided! Thus, evaluating the function of the foot/ankle is essential.
Here are a few screening tests you can do for the key joint and muscle dysfunctions often found in the foot, ankle and leg. Mobility and strength exercises to help correct each condition are described as well.
1) DECREASED OR INCREASED ARCH HEIGHT AND ARCH MUSCLE WEAKNESS AND/OR TIGHTNESS
Studies show that those with much lower than average arches are at a greater risk of injury with running (6). There actually is less injury risk with slightly lower arches- in one study runners with slightly low arches had the same injury rate as those with neutral arches (6). The much lower height compromises the arch's ability to absorb impact forces and then return that energy during the push-off phase of walking and running. Thus, the arch and leg muscles which both support the arch and help create the "push-off" (these are the toe flexors, soleus, gastrocnemius and peroneals mainly) are overstressed. Plantar fasciitis, "shin splints", posterior tibial tendon injury, and Achilles tendon injury can result. These injuries are almost all seen at the inner (medial) leg and foot as the excessive pronation that occurs with the lower arch stretches and stresses these medial foot and leg structures.
Meanwhile, with a much greater than average arch height, more impact is felt "up the chain" in the leg, knee and so on as the arch doesn't collapse enough during the stance phase of gait. Stress fractures, lateral knee pain (such as Iliotibial band syndrome) and hip injury can result.
To find out if you have a low, medium (neutral) or high arched foot, we can use the “wet foot test”. To do this test, besides your feet and some water, you will need a sheet of paper that is wide enough for both feet to create footprints. First, thoroughly wet the soles of your feet. Then, step on the paper with one foot, then the other, side by side. The impression your wet foot leaves will tell you which type of arch you have. Neutral- you will see that the ball and heel of the foot plus some of the middle arch have touched the paper as these areas will be wet on the imprint. Low- there will be more of the middle arch imprinting the paper and less dry space. High- there will be a larger “dry” space and the wet pattern will be more of the outer foot than the inner.
Note- besides being “born” with low or high arches, as we age our arches can flatten and become lower. Obesity, pregnancy and acquired arch muscle weakness can also contribute to a loss of height. As for high arches, they are mostly genetically determined, although if your arch muscles become very short and tight your arch ligaments and tendons could shorten and contribute to less shock absorption along with the higher arch.
Also, "overpronation" is a functional lowering of the arch that occurs with weight bearing and walking and/or running. It involves the ankle bone lowering inward and the foot turning outward. Pronation is a normal motiion, but sometimes it is excessive and thus called overpronation. As noted in the 4th paragraph above, a lower than average arch can lead to excessive pronation. But, overpronation can also occur without lower arches that are "just there" statically (without movement). There are many causes of overpronation. For example, the arch on one side might pronate and thus lower more to compensate for a functional or anatomical leg length inequality (LLI) or other hip or spinal imbalance. An office exam by a sports chiropractor is often needed to screen for this compensation and treatment may be needed. Overpronation and LLI will be covered in a future article, but some of the exercises described below in the section on calf and ankle joint tightness can help if the overpronation is a compensation for those conditions.
Self-Care/Actions to take for your arch height: If you have a lower than average arch, strengthening the arch muscles that support the arch can help prevent injury (7). In fact, the lower your arch height, the more important it is to do toe/arch strengthening exercises. Running performance after a program of arch exercises improved more in the lower arched runners than those with neutral arches. Also, a shoe that has more stability, or an insert (orthotic) that adds medial support, can help to limit the effects of the lower arch.
For strengthening, The “ToePro” device can be used. It is a new piece of equipment that helps strengthen the arch muscles. It accomplishes this by strengthening them as they are lengthening (stretching). This is called "eccentric" exercise (when a muscle lengthens = the eccentric phase, when a muscle shortens = the concentric phase). Research shows most gains in strength are accomplished during the eccentric “lowering of the weight” phase, as the muscle stretches. The key muscles are the flexor hallucis brevis, abductor hallucis, and flexor digitorum brevis. The ToePro makes it easier to do these eccentric strength exercises. It is made of a flexible rubber material that ridges to place your toes on. Basically, you step up onto the device into a calf raise while pressing your toes into the ToePro. Click on this link to learn more about the ToePro and view the exercises: https://humanlocomotion.com/products/toepro-foot-ankle-exercise-platform
Another option is using an "Airex" foam balance pad to do the same eccentric toe exercises as with the ToePro. These eccentric options are an improvement over the traditional arch strengthening "marble pick up" and "towel crunch" exercises usually prescribed, as with eccentrics the toes are strengthened in the same functional position they are used when walking or running (8).
Besides the toe exercises, another way to strengthen your arch muscles is to wear “minimalist’ shoes for daily activities (9). Minimalist shoes are those lightweight shoes that have a very low to zero toe to heel “drop” (the height of the shoe at the toebox vs. the heel). The Altra brand is one example. Minimalist shoes also sometimes have a wider toe box to let the toes spread in the natural way they were meant to and thus have more range to move, which in turn strengthens the same arch muscles mentioned above that the Toe Pro exercises do.
2) FIRST TOE AND ANKLE MOTION, CALF TIGHTNESS, AND/OR WEAKNESS, AND WEAK OR TIGHT PERONEAL MUSCLES. These are all necessary for normal and powerful foot motion.
A) First toe motion: For proper push-off to occur, ideally the first or "big toe" must be able to dorsiflex from 70 to 90 degrees. This means that as you walk or run, the foot bends over the planted big toe to at least 70 degrees and also ideally remains aligned with the foot, not deviating inward towards the other toes. When this motion is optimal, the gastrocnemius, soleus and peroneal muscles of the leg can contract strongly to stabilize the foot. This in turn helps the gluteus maximus contract to extend the hip and propel us forward. Thus, this motion of the first toe is essential as besides helping the arch function normally as described above, it affects the entire gait cycle.
First toe Test and Stretch exercise: Standing First Toe Extension (Dorsiflexion) Test/Stretch:https://vimeo.com/268078467/09dd17b59b
Stand with the foot on the side to be tested behind the opposite foot and raise your heel off the ground until the motion at the toes starts to be limited. The big toe should remain on the ground- the dorsiflexion motion takes place at the first metacarpal phalangeal (MCP) joint. Note the angle the big toe makes with the rest of the foot. Again, 70-90 degrees is the desired range.
First Toe Self-Care: If the range is limited, self-massage with a golf ball or other massage tool can help release the tight toe flexor muscles as can office treatment to the arch muscles and 1st MCP joint ligaments with techniques such as Active Release. https://vimeo.com/269428879/ad4fd8bcaa
Once the first toe is loosened, the ToePro exercises described above will help to strengthen the first toe flexor muscles in their full range of motion.
However, if either "Hallux Limitis"(stiffness and/or mild degenerative arthritis of the first MCP joint) or "Hallux Rigidus" (extreme degenerative arthritis of the first MCP joint) is present, they can cause limitation that can be more difficult to treat with soft-tissue techniques and exercises, but they can still help improve the range of motion. If the condition has progressed to "Rigidus" and there is very little joint motion, special shoes with "rocker" bottoms may help produce the toe off motion. Also, "Hallux Valgus" is another condition that can limit normal dorsiflexion of the first toe. https://vimeo.com/268085613
The first toe is angled towards the other toes in this condition. Treating the first toe adductor muscle (adductor hallicus muscle) with self myofascial release and/or Active Release Technique by a sports chiropractor can sometimes help along with treatment of the 1st MCP joint ligaments. Surgery is sometimes performed for these conditions but should be a last resort!
B) Ankle movement- The ankle bone, or talus, must have the right balance of joint movement and stability for the leg to move efficiently from impact to push off. This movement provides a stable foundation for the more powerful gluteal muscles above to work from and propel us forward. Without the proper ankle motion, the foot can compensate, and the arch will lower as the foot pronates and "toes-out" more to create the motion lacking above at the ankle. Also, lack of talus motion can cause the calf muscles to tighten as well and then in a chain reaction, limit those gluteal muscles above from contracting. "Knee-down" walking and running can result and leads to more stress on the knees and hips. A poorly treated ankle sprain, with chronic scar tissue, will alter the talus motion at the ankle and can lead to this scenario (See “Ankle Pain and Running: What you don’t know can hurt you” article).
Ankle Mobility Tests
1- Ankle Open Chain Dorsiflexion Test: https://vimeo.com/332752022/d196de1f56
Test: Seated on the floor with your legs straight out in front of you, move your foot first upward towards your leg (dorsiflexion) as far as you can. **This motion should occur at the ankle joint, and not the foot (arch or toes).
Screens for: Ankle joint range of motion, calf muscle length in the open-chain (non-weight bearing) position. With dorsiflexion, feel/look for restriction in motion of the calf muscles (gastrocnemius and soleus in the back of leg) or the ankle joint itself. Normal range of ankle dorsiflexion is about 20 degrees from starting with the foot about perpendicular to the floor. The video shows first a normal dorsiflexion range. Then it shows gastrocnemius tightness as the knee flexes/rises some. Next, the ankle joint is restricted and limits motion into dorsiflexion (this also can be due to soleus muscle/achilles tendon tightness). Then, the video shows restricted dorsiflexion with excessive pronation compensating for the loss of ankle motion.
Normal- With dorsiflexion, the foot moves towards the leg to an angle of at least 20 degrees. The foot does not pronate or supinate and stays in line with the tibia in both directions.
Mild Dysfunction- with dorsiflexion, the knee flexes/rises some, indicating gastrocnemius tightness.
Moderate Dysfunction - the ankle joint is restricted and limits motion into dorsiflexion. This also can be due to soleus muscle/achilles tendon tightness.
Severe Dysfunction- there is severely restricted dorsiflexion with excessive pronation.
2- Ankle Open Chain Plantar Flexion Test: https://vimeo.com/332752028/5c5ed961d6
Test: Seated on the floor with your legs straight out in front of you, move your foot downward as far as you can, **This motion should occur at the ankle joint, and not the foot (arch or toes should stay in neutral or only move slightly into flexion at the end of the range of motion).
Screens for: Ankle joint range of motion, length of anterior leg muscles (the dorsiflexors= tibialis anterior, toe extensors) in the open-chain (non-weight bearing) position. With plantarflexion, feel/look for restriction in motion of the muscles, or the ankle joint itself. Normal range of ankle plantarflexion is about 50 degrees from the neutral (foot parallel to the ground) position. The video shows first a normal plantarflexion range. Then it shows tightness as the foot doesn't reach 50 degrees and tightness if felt in the anterior leg muscles. Next, the ankle joint is restricted and limits motion into plantarflexion. This also can be due to tibialis anterior muscle/tendon tightness. Then, the video shows restricted plantarflexion with excessive supination compensating for the loss of ankle motion.
Normal- With plantarflexion, the foot moves away from the leg to an angle of 50 degrees. The foot does not supinate and stays in line with the tibia.
Mild Dysfunction- with plantarflexion, the leg does not reach 50 degrees, indicating tightness.
Moderate Dysfunction - the ankle joint is restricted and limits motion into plantarflexion. This also can be due to extreme tibialis anterior muscle/tendon tightness.
3- Standing Ankle Flexion Test: https://vimeo.com/268911305/af665d6b0e
Purpose: To assess functional ankle joint mobility and deep calf (soleus) muscle flexibility. Significance: Lack of ankle dorsiflexion is a proven risk factor for foot and ankle injury, as well as injuries further up in the knee, hip and lower back. Compensatory foot pronation may occur.
Starting Position: Standing with legs shoulder width apart, hands at sides.
Action: Without bending at your waist, kneel forward from the ankles and knees.
Scoring: None/mild Dysfunction- Upon bending there is at least 30-35 degrees of leg motion (tibia moving from vertical downward toward the foot) and no foot pronation (ankles rolling in)..
Low Moderate Dysfunction: There is less than 30 degrees of motion on one or both sides. The feet do not pronate/knees do not move inward; they stay relatively stable.
High Moderate: There is less than 20 degrees of motion. The feet may pronate (ankles roll in) and the knees may move inward on one or both sides.
Severe: There is little to no motion at the ankle joint in dorsiflexion (less than 10 degrees) and/or extreme foot pronation on one or both sides (Severe is not shown on video).
C) Calf tightness and/or weakness independent of the above 3 factors (arch height, 1st toe and ankle mobility) can also exist and then lead to the same compensatory pronation and chain reaction up to the leg, knee, hip and back. The self tests for calf tightness are also the Open Chain Dorsiflexion/Plantarflexion and Standing Ankle Flexion tests just described above.
D) Weak and/or tight peroneal muscles/tight lateral ankle ligaments- the peroneals are on the outside of the leg which contract to stabilize the ankle (preventing ankle sprains) and as noted above play a role in helping the foot provide a stable base of support for movement.
Self-tests for Peroneal Tightness (no video):
For tightness, assess by sitting with your leg to be tested crossed over the opposite knee. Grab the foot with the opposite hand across the arch, thumb on the inside. Next, move the foot into “inversion” by pulling it with your hand. The normal range should be about 30-40 degrees. If you feel a pull or tightness on the outside of your leg, anywhere from the ankle up the outside of the leg to just below the knee, you have some degree of peroneal and/or lateral ankle ligament tightness. Mild is just a slight stretch, Moderate is a restriction in the foot/ankle motion also, and Severe is a lack of any foot/ankle motion.
Ankle and Leg Muscles Self-Care:
Mobility Exercises
-Foam Rolling Videos and Instructions: Using a foam roller on a daily basis and pre and post exercise can help release “adhesions” and “trigger points” that form from overuse and strain as well as lack of stretching and sitting too much. Active and static stretching also work better after a muscle has been “rolled out” as these tight spots are difficult to stretch and can even be strained by forcing a stretch.
- Calf: https://vimeo.com/269427635/0c83846406
- Side of Leg (Peroneals): https://vimeo.com/269428552
- Rolling Front of Leg: https://vimeo.com/269427797
-Manual Self Mobilization of the Ankle (no video): sit with the ankle to be mobilized crossed over the opposite knee. Grab the foot with the opposite hand across the arch, thumb on the inside. Next, move the foot into “inversion” by pulling it with your hand as far as you can, stretching the lateral (outer) ligaments fully. Then, push the foot back laterally stretching the medial (inner) ligaments fully. Repeat moving the foot back and forth 5-10 times in each direction. Next, still holding the foot with the opposite hand, stretch the front of the ankle by pulling the foot downward as far as or will comfortably go, and then stretch the back of the ankle by pushing the foot back up as far as it will go. Repeat 5-10 times in each direction.
Strength/Balance Exercises
-Manual Strengthening of the Ankle (no video): Positive or “concentric” pressure- sit with the ankle to be strengthened crossed over the opposite knee. Place the fingers of the hand of the side you are strengthening along outside of the foot, and the fingers of the other hand on the inside of the foot. Next, move the foot inward against the fingers there as far as it will go, providing resistance with the hand. Then, without letting the foot move back at all, makes sure the fingers on the outer side are flush against the foot and then move the foot back outward as far as it will go. Repeat 10 times in each direction for 2 sets.
Negative or “eccentric” pressure- from the same position, now, instead of pushing the foot against the fingers, push with the fingers against the foot in each direction for the full range of motion. You will be now “resisting” the pressure from the hand instead of pushing against the hand, just as when you slowly lower a weight with an exercise like the bench press or bicep curls. As noted above with the ToePro description, the “eccentric” or “negative” phase of a strength exercise is more effective at causing strength gains than the concentric if you move slowly.
-Strengthening of the Ankle: Resistive Bands
These resistance band exercises are done in 4 phases as the videos show. Progress through the phases over time' usually a week to 10 days is needed for each phase. Perform these exercises daily or at least 3-5 days per week. For each exercise, sart with 10 seconds and 6 reps for a total of 60 seconds. As you improve, gradually work up to two sets of 30 seconds.
Phase 1: Slow and short range. Find the "mid-range" between the ends of the full range of motion. Next, move slowly back and forth just 5 degrees in each direcction.
Phase 2: Fast and short range. Again find the mid-range and now move fast 5 degrees in each direction.
Phase 3: Slow and full range. Now, move through the full range of motion but slowly.
Phase 4: Fast and full range. The last phase is full range and fast motion.
Ankle Dorsiflexion: https://vimeo.com/451670231/3ff30cf53b
Ankle Plantarflexion: https://vimeo.com/451674531/9829f3337f
Ankle Internal Rotation: https://vimeo.com/451665151/94219c4373
Ankle External Rotation: https://vimeo.com/451667104/10f4f8c76b
-Traditional Standing Double and Single Leg Calf raises (no video): Double- Stand with just the ball of your foot on a step or raised exercise platform, with the leg in the stretched position (heel lowered below the surface as far as it will comfortably go). Next, raise up using your calf muscles so that your weight shifts further forward onto the toes and your calf muscles tighten. As with the ToePro exercises, focus on putting weight on the big toe as you rise. Hold for half a second and then lower your body back into the starting position. Repeat for 2-3 sets of 15-20 reps. Single leg calf raise- Repeat the same exercise but after raising up, bend one knee so you are standing on just one leg. Then, slowly lower your body weight on just the single leg. *For Achilles tendon strengthening, work up to spending 10 seconds in the lowering phase. This slow “eccentric” exercise helps to stimulate collagen…
-Single Leg Stance with Knee Hug and with Calf Raise, plus Marching Calf Raise (no videos): For a more advanced exercise, perform a standing knee hug with good posture, maintaining a neutral spine (slight lower back arch). The knee should reach mid-chest level if you have good range here. Next, do a single leg calf raise, hold for a second, and return. *Maintain pressure on the first toe to keep the ankle from rolling outward (inverting) and thus activating the peroneal muscles (everters). Repeat 10 times. For an even more challenging exercise, “march” forward as you do the calf raise, and alternating the knee hug side, marching across a 10-15 foot distance. Again, maintain the peroneal muscle activation as you move forward. This exercise is a great challenge for ankle stability and balance.
Performing these self-tests and then exercises to work on mobilizing, stretching and strengthening as needed can help you maintain arch and leg strength and mobility as you age. Note: There are many other exercises that can be done; these are just a few and a good place to start.
Office care of course may also be necessary to balance out your feet: including specific myofascial release of stubborn scar tissue in the ankle ligaments, calf, and arch muscles/fascia from previous strain/injury. And adjustments to the spine and pelvis and ankle can be performed to ensure proper leg length alignment and joint motion.
1. Moon D, Kim K, Lee S. Immediate effect of short-foot exercise on dynamic balance of subjects with excessively pronated feet. J Phys Ther Sci. 2014; 26:1.
2. Sulowska I, Oleksy L, Mika A, Bylina D, Sołtan J The influence of plantar short foot muscle exercises on foot posture and fundamental movement patterns in long-distance runners, a non-randomized, non-blinded clinical trial. PLoS ONE. 6/23/2016, Vol. 11 Issue 6, p1-12.
3. Kokkonen, J, et al. Improved performance though digit strength gains. Research Quarterly for Exercise and Sport. 1988. 59:57-63.
4. Beijersbergen CMI1 , Granacher U, Gäbler M, et al. Power training-induced increases in muscle activation during gait in old adults. Med Sci Sports Exerc. 2017 June 7.
5. Endo M, Ashton-Miller J, Alexander N. Effects of age and gender on toe flexor muscle strength. Journals of Gerontology. Series A, Biologic Sciences Med Sciences. 2002. 57A(6):M392-397.
6. Nielsen R, Buist I, Parner E, et al. Foot pronation is not associated with increased injury risk in novice runners wearing a neutral shoe: a 1-year prospective cohort study. Br J Sports Med. 2014;48(6):440–447.
7.Zhang X, Pauel R, Deschamps K, et al. Differences in foot muscle morphology and foot kinematics between symptomatic and asymptomatic pronated feet. Scand J Med Sci Sports. 2019;29(11):1766–1773.
8. Kitai T, Sale D. Specificity of joint angle in isometric training. Eur J Appl Physiol Occup Physiol. 1989;58(7):744–748.
9. Ridge S, Olsen M, Bruening A, et al. Walking in minimalist shoes is effective for strengthening foot muscles. Med Sci Sports Exerc. 2019;51:104–113.
Share Article 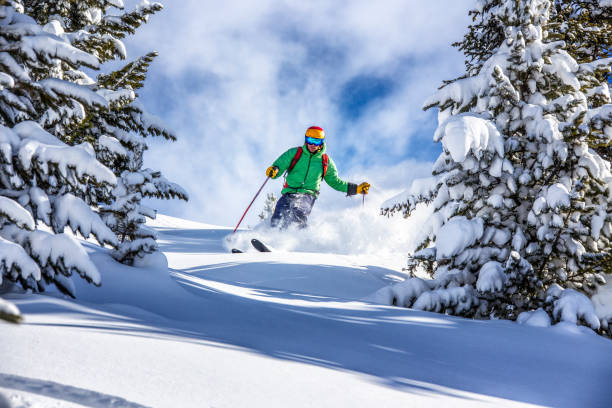

